VideoGrace System Setup
Before you can hold video conferences and make video calls, you need to do a number of preparatory operations, such as creating and configuring users, conferences, setting access rights, installing client applications.- Manually create user accounts
- Loading user accounts from a csv file
- Installing client applications
- Creating and setting up conferences
- Adding participants to the conference
- Configuring the conference scheduler
Manually create user accounts
-
Log in to the admin panel, go to the "Users" menu and click "Create a new user"

-
In the form that opens:
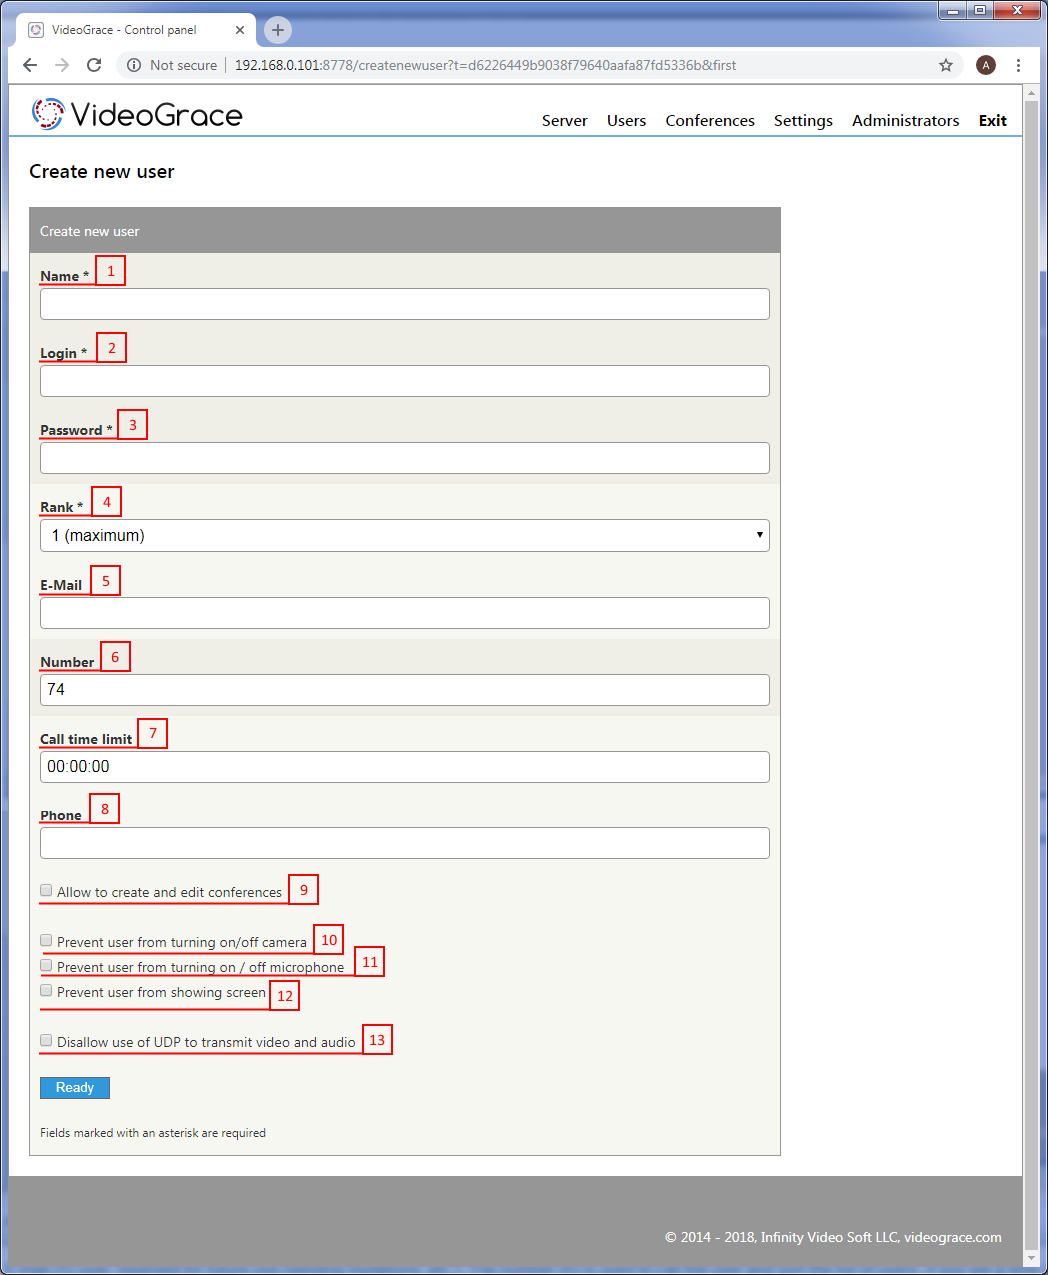
The Name (1), Login (2), Password (3) and Rank (4) fields are required. User name (1), is displayed in the list of users of client applications. Login (2) and Password (3) are used to authenticate the client application on the server. Rank (4) affects the position of the user in conferences created on the fly (these are such conferences when one user calls another, and in the process connects the third, fourth, etc.). The higher the rank of the user, the higher he will be in the list of participants of such a conference.
E-mail (5) user, reserved for future use (sending invitations, etc.). The number (6) is used to call the user and sort the list of users. If you set a time limit (7), when a call is made to this user, a countdown will be conducted, and when the time expires, an automatic shutdown will occur. A telephone (8) is also reserved for future use.
If you set the flag (9), the user can independently, using his client application, create and edit his own conferences. Flags (10), (11) and (12) prohibit independently switch on / off cameras, microphones and screen display. The flag (13) obliges to transmit video and sound via TCP, use it only if it is impossible to work on UDP (for example, due to blocking).
- After filling out the form, you should click the "Finish" button, then the list of users will open To create the next user, click "Create a new user" and repeat step 2. It is important that each user has a unique username and number to call. Note that the specified user logins and passwords are then entered into client applications.
Loading user accounts from a csv file
-
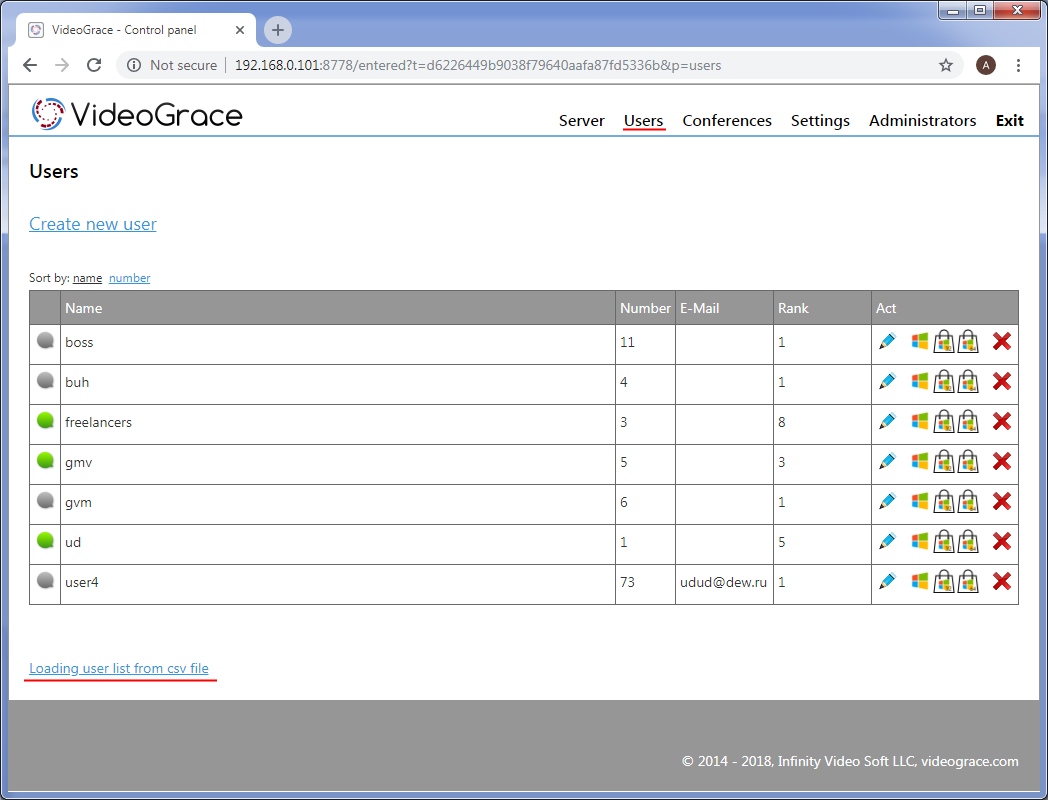
Go to the list of users and click "Loading user list from csv file"
-
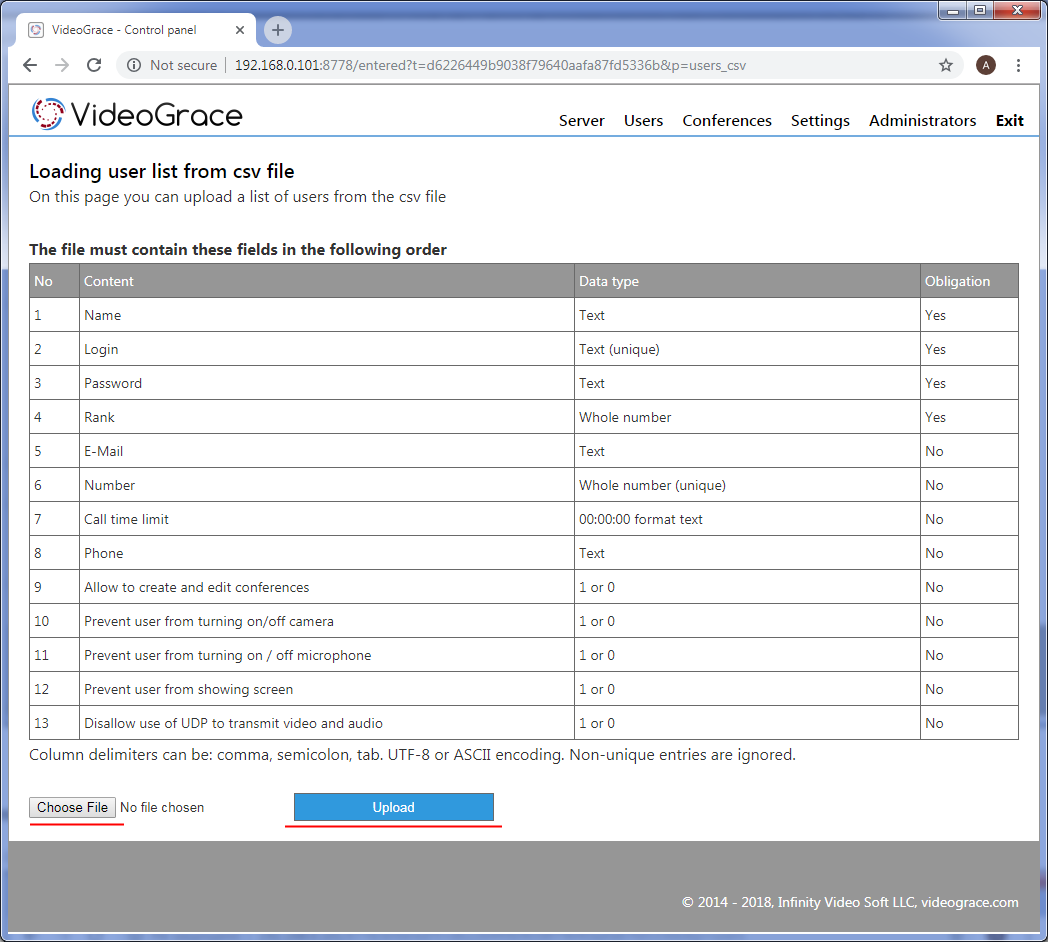
On the page that opens, select the csv file with the list of users and click "Download." The CSV file can be downloaded from Active Directory or similar storage.
Installing client applications
-
Go to user list
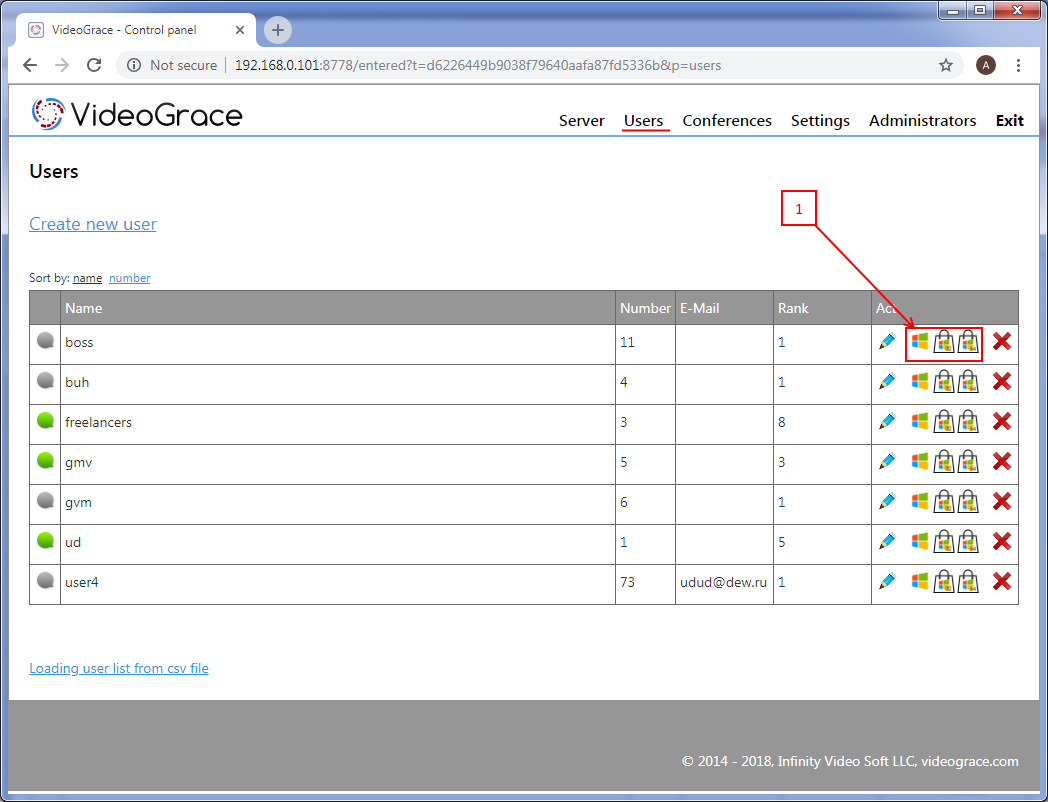
Pay attention to the links (1) for each user. These links allow you to download a personal distribution or portable version for Windows without the need for further configuration after installation. The program will start immediately with the desired server address and username / password of the desired user. - Distributions for other operating systems can be downloaded from the page videograce.com/download and they require manual configuration of the server address and login / password.
Creating and setting up conferences
You can create a conference on the fly from the client application, by simultaneously calling several users, or permanent, which will be saved on the server in the conference list. Permanent conferences are good because you can add participants to them in a specific order, and you can also install them into the task scheduler and they will start automatically at a specified time. The following is a description of creating such conferences from the admin server panel.-
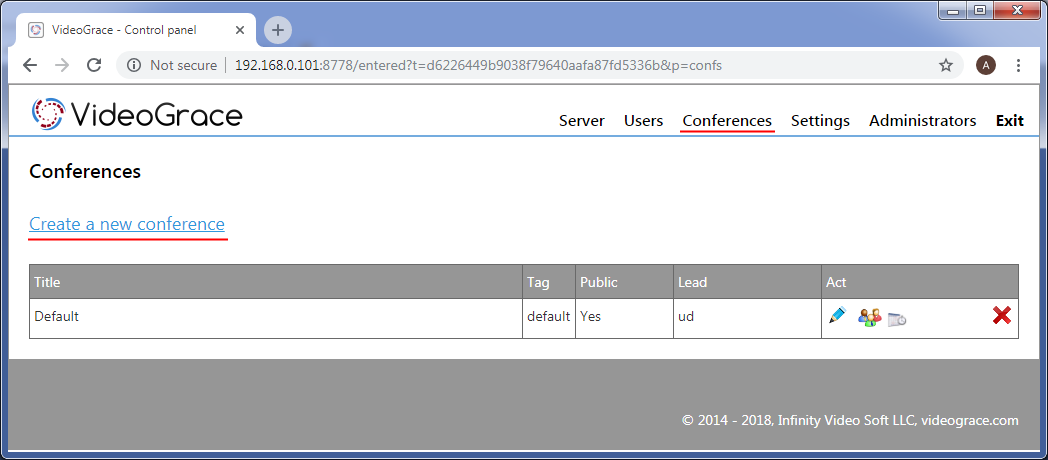
In the server control panel, go to the "Conference" menu and click "Create a new conference"
-
Conference creation / editing form:
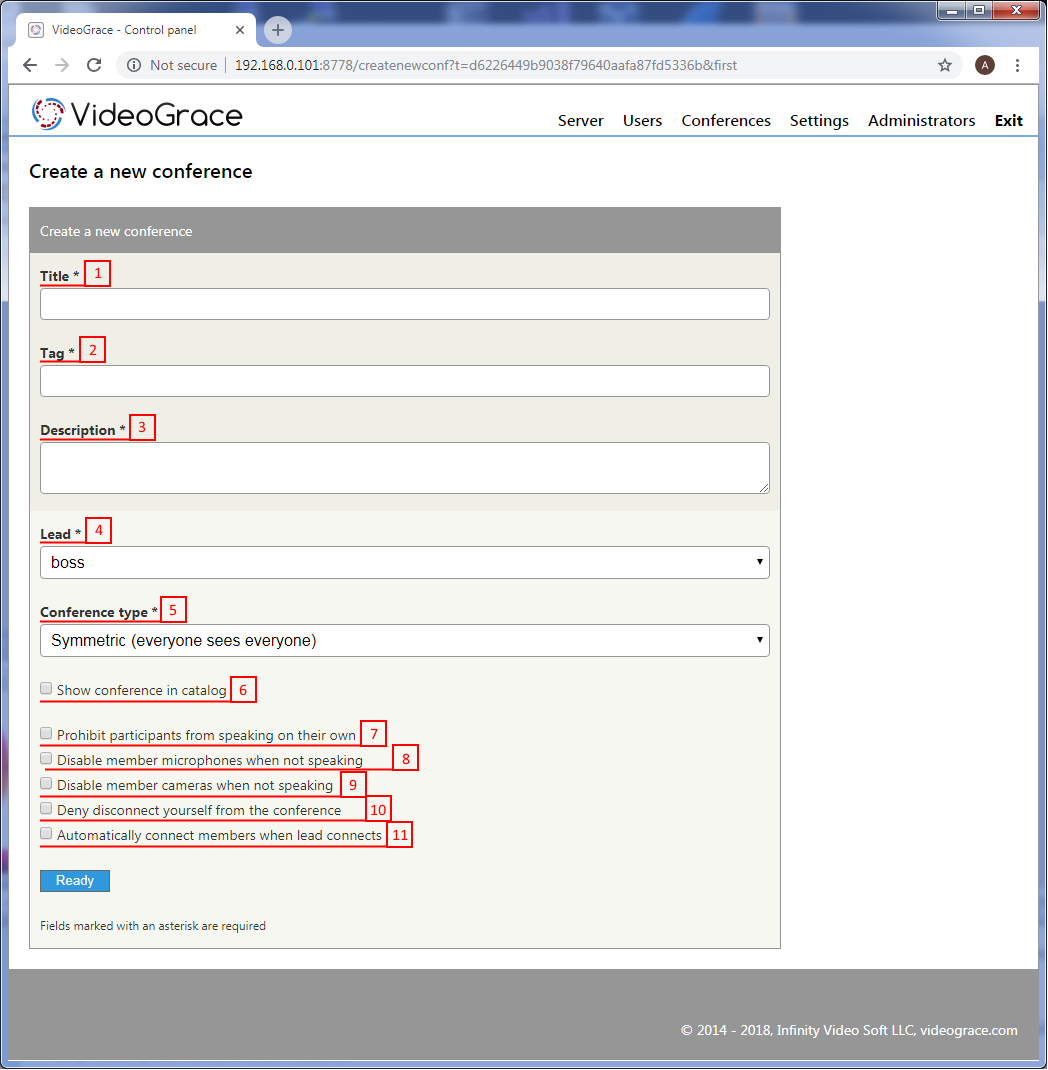
The name (1) of the conference is displayed in the list of server conferences and client applications. Tag (2) is the unique symbolic identifier of the conference and is used to create its URL. Description (3) may contain the goals and objectives of the conference.
Lead (4) has moderator rights, can control the participants, turn on / off their cameras and microphones, display them in the main window, delete and connect to the conference.
Conference type (5) is symmetrical and asymmetrical. In symmetrical conferences everyone sees and hears everyone, in asymmetrical presenters sees and hears everyone, and the rest of the participants are only those who took the floor and the presenter.
When the flag (6) is enabled, this conference will be visible in each client application and in the public directory of the server, otherwise, it will be in the list of conferences only for the presenter and its participants.
The flag (7) is needed for asymmetric conferences. If the participant wishes to take the floor, a request will be issued to the moderator for permission to give this user the word.
When the flag (8) is turned on in asymmetric conferences, viewers (participants who have not taken the word at the moment) will not transmit the sound to the host.
If you turn on the flag (9) in asymmetric conferences, viewers will not transmit their video to the host.
Participants will not be able to disconnect from the conference until the presenter disconnects them or it ends (when the presenter is disconnected) when the flag (10) is turned on.
If the flag (11) is turned on when the presenter is connected, all conference participants, including those who are late, will automatically connect at the moment they appear on the network.
Adding participants to the conference
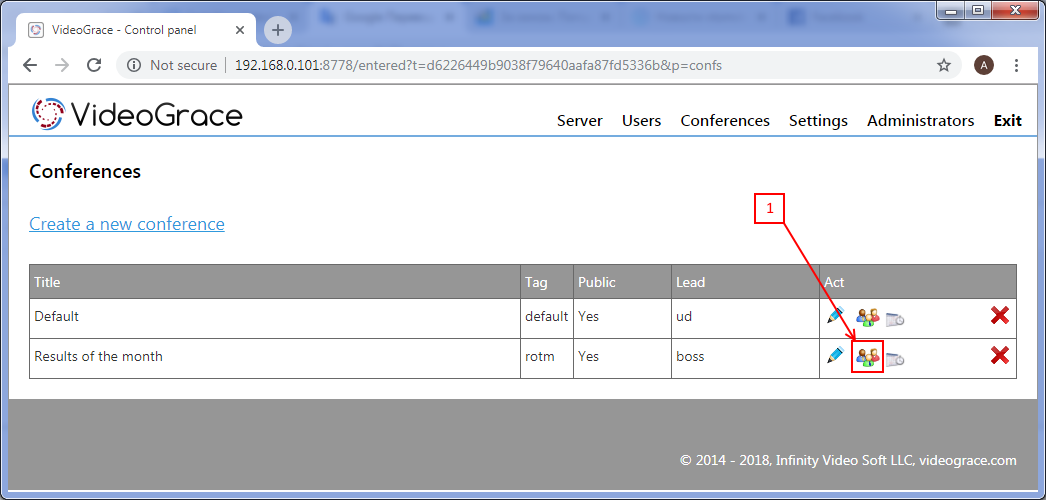
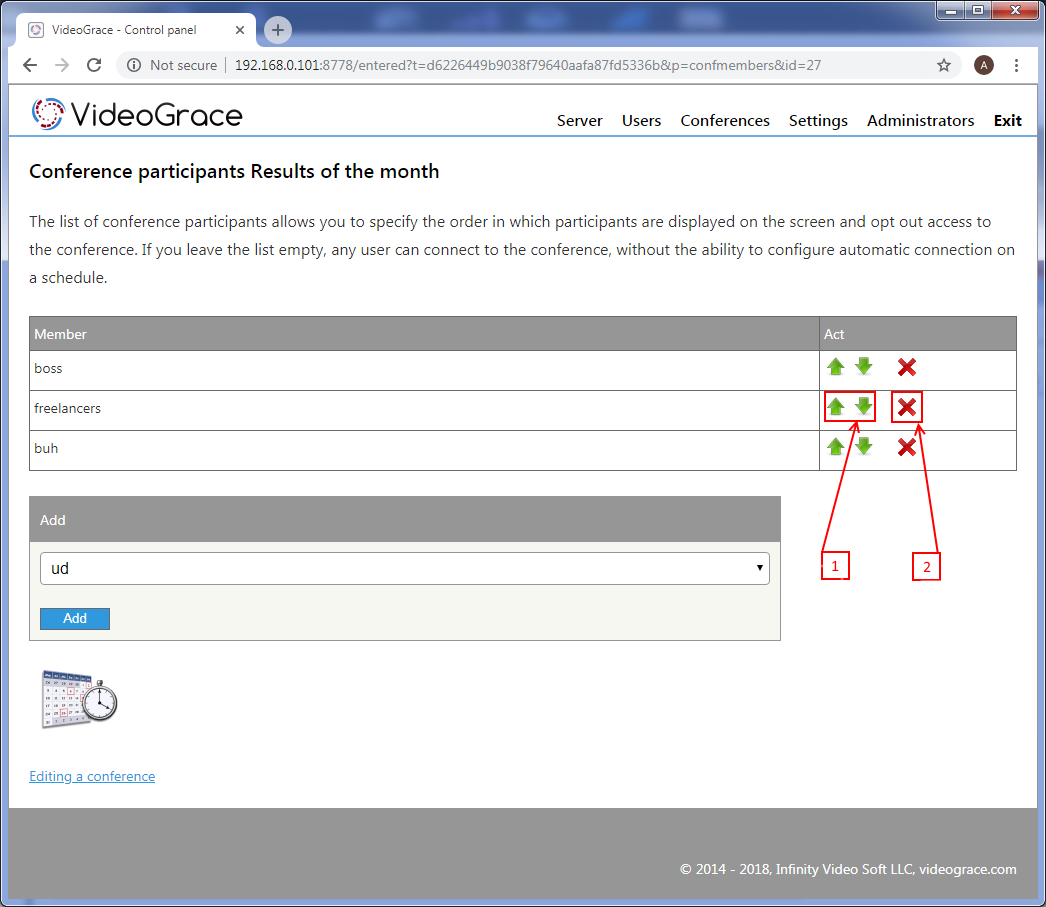
The list of conference users is needed to build up the order of display, access restrictions and work scheduler. If you leave the list empty, any user will be able to connect to the conference, the display order will be arbitrary, and the scheduler will not work. When adding users to this list, users who are not included in it will not be able to connect to this conference, users from the list will always be at the same place on the screen, and the scheduler will automatically connect them to the conference at the appointed time.-
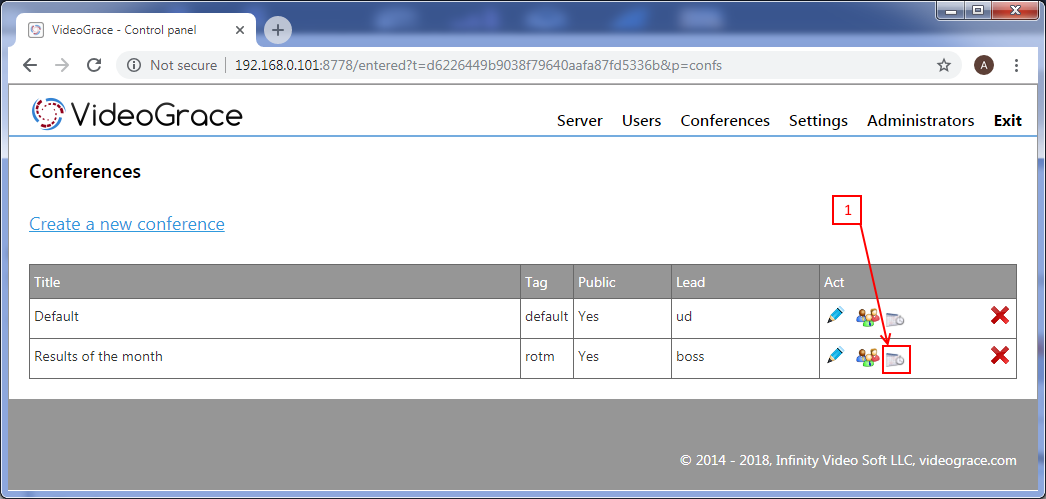
In the list of conferences, click on the icon (1)
-
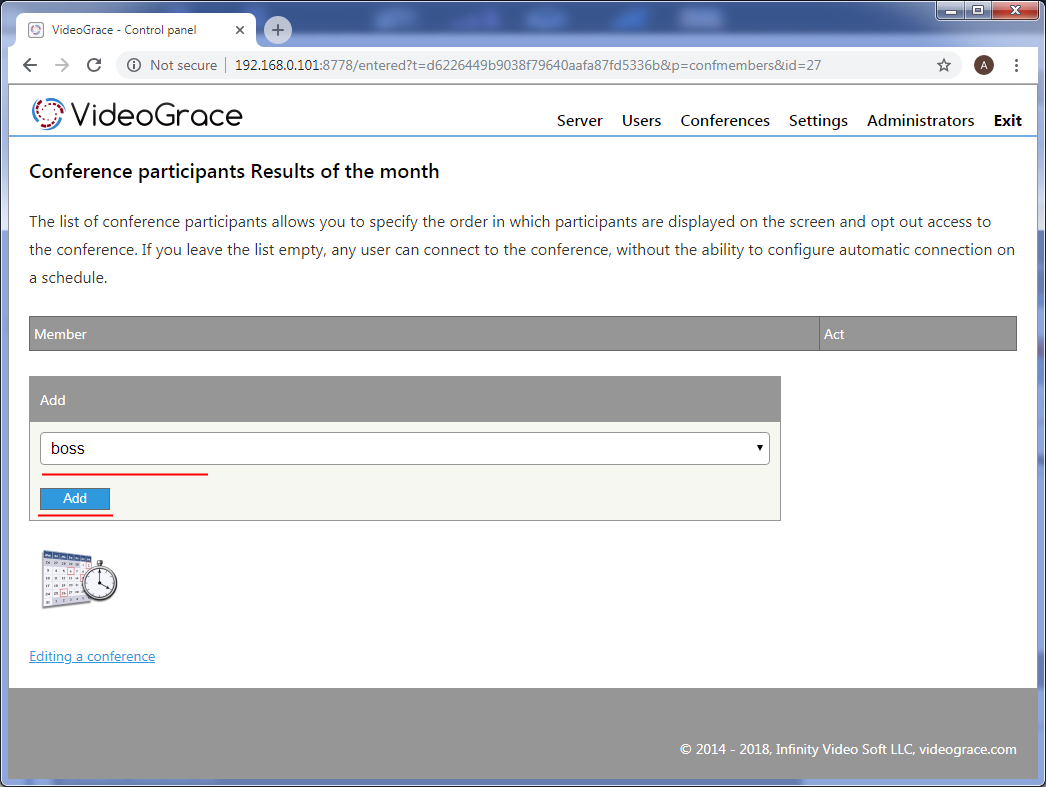
Select the desired user and click add. Do this with all the users in the conference.
-
To change the order of users, use the arrows (1), to remove the cross from the list (2)
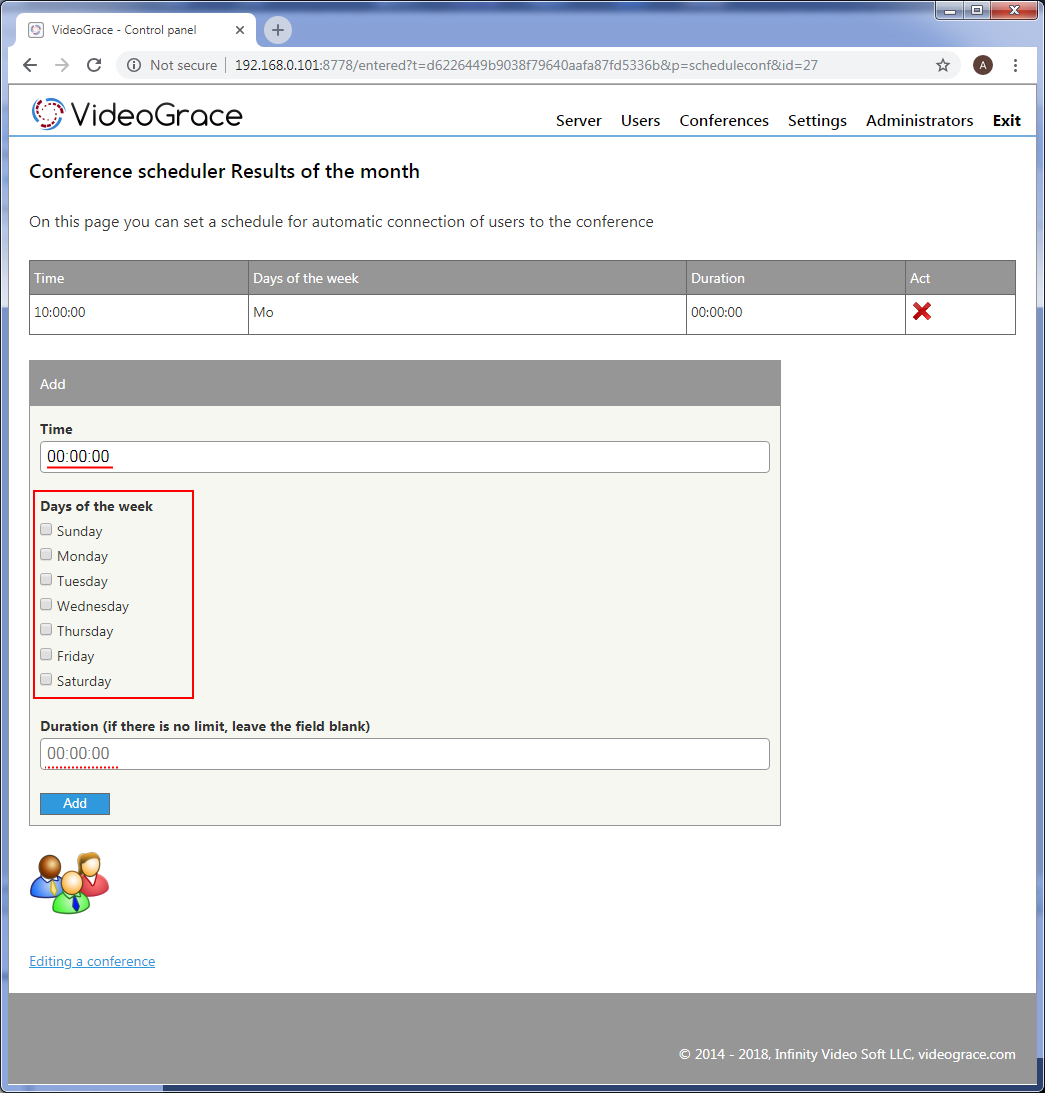
Configuring the conference scheduler
Scheduler allows you to automatically start a conference at a specified time. The planner’s job requires that the conference list of participants be complete.-
In the list of conferences, click on the icon (1)
-
Enter the required time, select the desired days of the week and click add. You can add several such tasks. When a time limit is set, the conference will automatically end after this value has expired, and also, during the conference, late users who later connect to the network will be connected.
<- Server installation | Table of contents | Conferences and video calls ->