Installing VideoGrace Server
The central node of the system is the server. It stores user accounts, conferencing settings, access rights, transmits and multiplies traffic. The server can be installed on a specialized server machine or on a regular PC.- Installing on Windows
- Installing on Linux
- VideoGrace Server Preparation
- Actions to access clients from the Internet
Installing on Windows
- Download the VideoGrace Server for Windows distribution from: videograce.com/download
- Run the file from the site
- Follow the installer steps
- Confirmation of the correctness of the installation will be made by opening the web browser of the server page http://localhost:8778 / (VideoGrace Server control panel)
- The service listens to all network interfaces available on the server machine; the installer automatically allows Windows Firewall access to all service ports during installation.
Installing on Linux
The steps below are completely correct on Ubuntu 14.04 LTS X64, 16.04 LTS X64, 18.04 LTS X64 when using other distributions it may be necessary to correct.- Download the VideoGrace Server for Linux distribution from: videograce.com/download
- Unpack the archive from the site:
tar vxf VideoGraceServer-X.Y.ZZZZZZ-x64.tar.bz2
- Go to the folder with the files and perform the installation as root
cd VideoGraceServer-X.Y.ZZZZZZ-x64
sudo ./install.sh
- VideoGrace Server should automatically start in the previous step.
-
Add a VideoGraceServer launch to /etc/rc.local or a similar startup point.
nano /etc/rc.local
-
To stop the service use killall
sudo killall VideoGraceServer
- Confirmation of the correctness of the installation will be made by opening the web browser of the server page http://localhost:8778 / (VideoGrace Server control panel)
- The service listens to all network interfaces available on the server machine, but does not automatically configure the firewall. If locally port 8778 is available, but not from the network, you need to add permission to the system firewall.
VideoGrace Server Preparation
The steps below contain steps for the initial setup of VideoGrace Server. Actions to create users, conferences, set access rights, etc. contained in the document system setup-
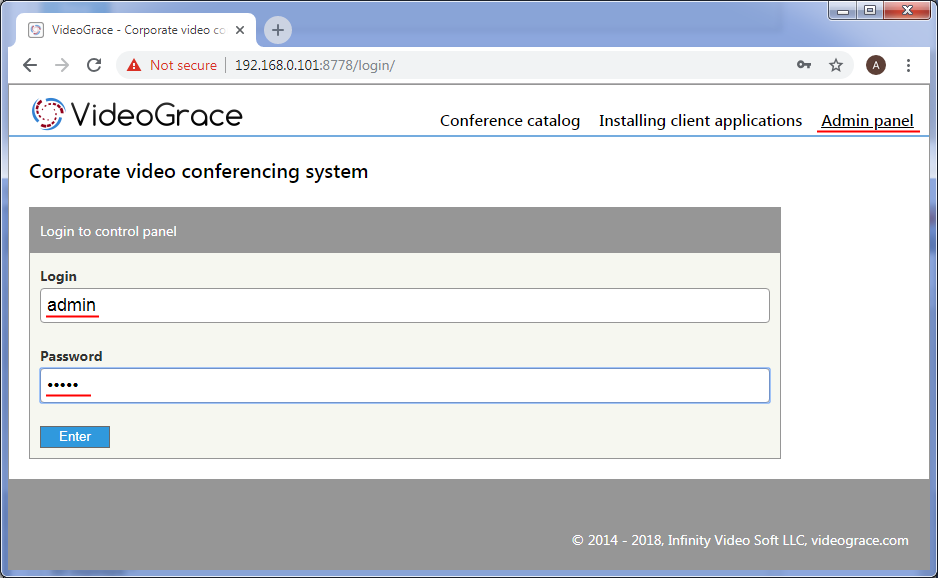
Open the web browser URL: http://server_Address:8778/ select the menu item "Admin panel", enter your username and password: admin / admin and click "Enter"
-
Select the menu item "Settings":
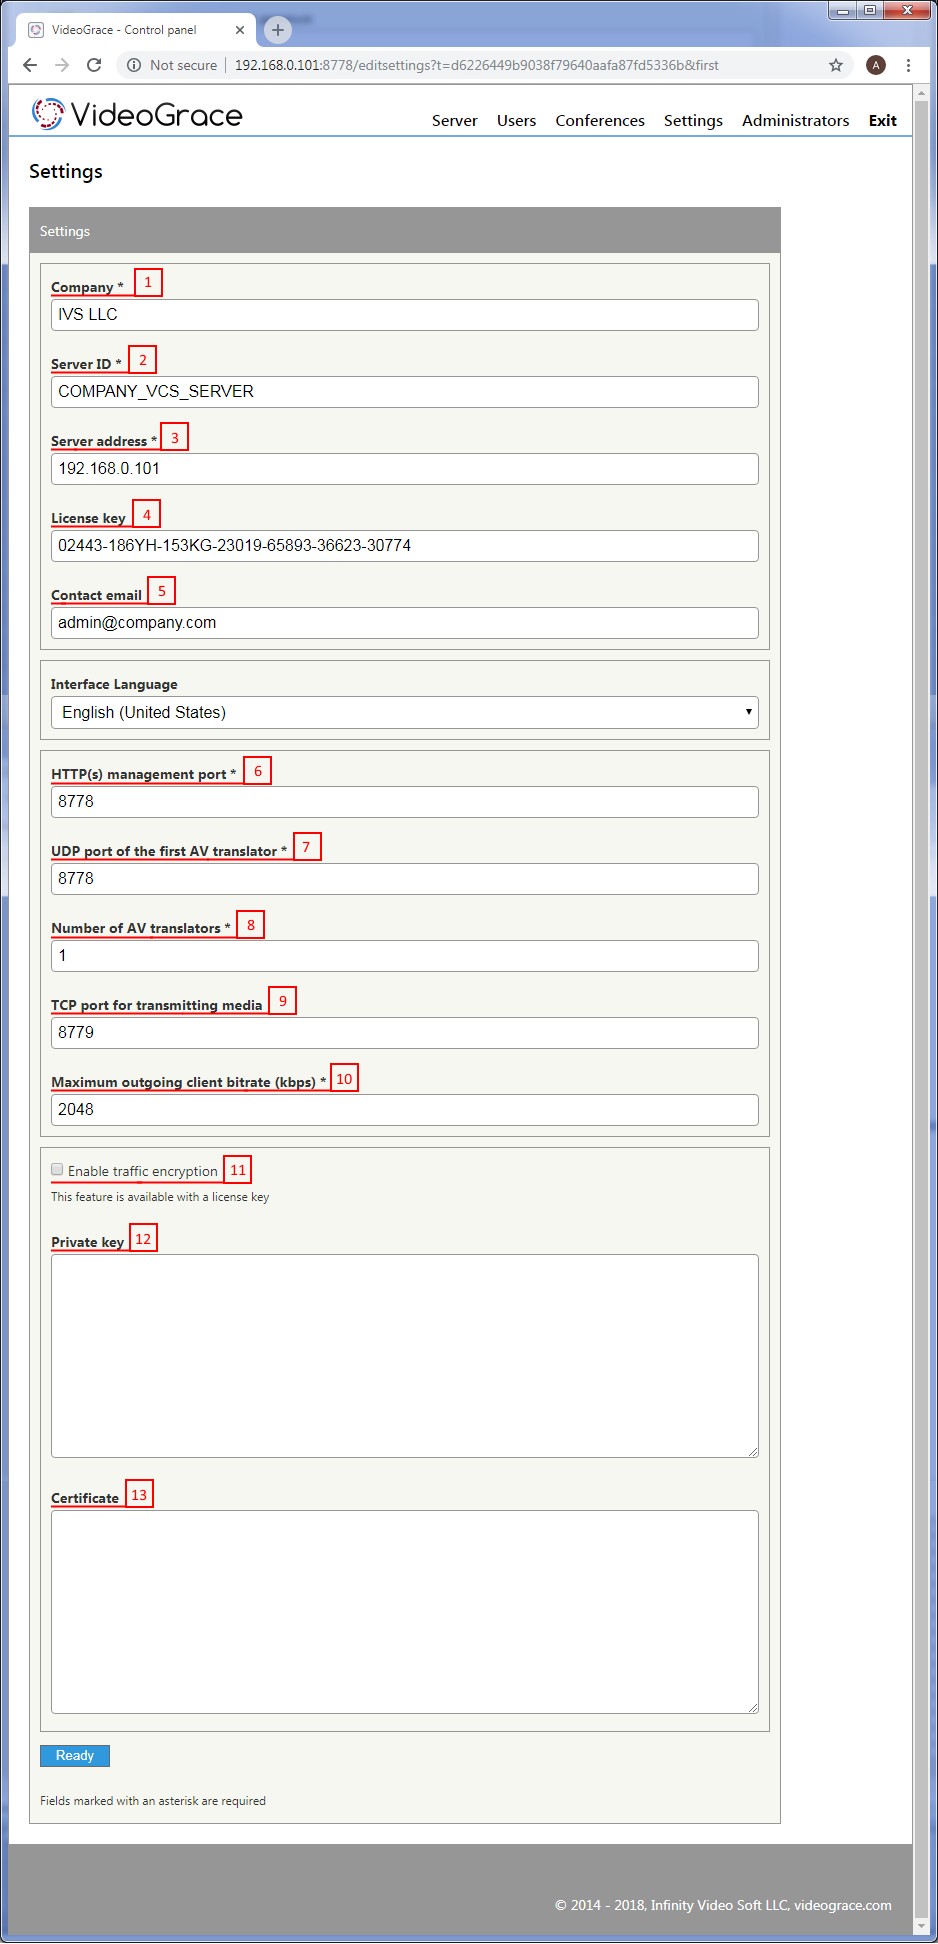
Specify the name of your organization (1), server address (3) and e-mail (5) where we will be able to send a letter in case of detection of a critical vulnerability, and also send a small report on innovations once a month. The service once a day checks for updates and sends us the name of the organization and the administrator’s e-mail. If you absolutely do not want to receive such letters, leave the e-mail field empty.
The server address field (3) is used when downloading client distributions. We recommend downloading client applications directly from your server; in this case, after installation, the server address (specified in (3)) and the username and password with the user password will already be entered in it. If the server is located behind NAT and ports from an external IP address are forwarded to it, it is better to specify the external IP or domain name in this field.
The license key (4) gives the right to connect more than 8 users, and allows you to enable such functions as traffic encryption, asymmetric conferences and recording.
HTTP (s) port (6) is used to control the server using a web browser and connect client applications (command protocol). In case of changing this port, do not forget to change it in the browser when connecting to the admin panel and in client applications.
UDP is used for video and audio transmission. Clients send and receive media traffic from AV translators. Each translator listens to one UDP port following the order of the port of the first AV translator, for example, in the case of 4 translators, at the port of the first translator 8778 (7), UDP ports will also be used: 8779, 8780, 8781.
The number of AV translators (8) is desirable to make equal to the number of processor cores of the server. This will allow a more even load of the kernels, but will also have to provide access to a larger number of UDP ports.
If some clients cannot work on UDP (for example, due to the blocking by the provider) or need to use certified crypto tools that work only with TCP traffic, it is possible to prevent selected clients from working on UDP. In this case, clients will send and receive video and audio via TCP to the TCP port specified in (9) for transmitting media data. This feature is available with a license key.
Client applications automatically determine the available network bandwidth and try to use it to the fullest extent to ensure the highest possible video and audio quality. However, the administrator has the ability to limit the maximum outgoing traffic from each client (10). Incoming traffic per client will be equal to (10) multiplied by the number of clients simultaneously connected to the conference.
When you turn on traffic encryption (11), the command protocol from http switches to https, and the video and sound is encrypted using AES-256 ECB. Fields (12) and (13) can be left blank, then the signed key and certificate itself will be installed. It is better to specify a certificate valid for your domain and a key after receiving them in one of the certification authorities (for example, letsencrypt).
Actions to access clients from the Internet
To connect clients from the Internet to a server located behind NAT on the local network, it is necessary to provide forwarding (DNAT) of ports 8778 TCP and 8778 UDP from an external address on the one on which VideoGrace Server is installed. If these ports conflict with ports of other systems, they can be changed in the control panel. It is important that the port numbers on the external interface (looking to the Internet) and on the local server are identical. When connecting clients from the local network should indicate the local address of the server, and clients from the Internet - external.If the server is installed on a machine with a real IP address, it is enough to open access to the specified ports on the Firewall.
<- Frequently asked Questions | Table of contents | System Setup ->